I
personally LOVE alternative bouquets and I’m constantly on the look
for new materials that I can make bouquets with. Don’t get me wrong
I love live flower bouquets but non-traditional bouquets can become a
family heirloom and can have deeply personal touches added to them.
This tutorial is a play on a simple paper bouquet but adds the
element of durability. I have seen several beautiful paper bouquets
but I always question how long the paper will last. There are so many
“what ifs” on a wedding day the last thing you want to worry
about is your bouquet falling apart. The great thing about this
bouquet is that the enamel gives a nice hard coating which will
protect your flowers and will look great all day and night long! The
only drawback to this tutorial is that there is a small investment
for necessary tools but if you are planning to become or are a
serious crafter than it is totally worth the cost.


Things
you will need for the flowers:
- Flower Paper Punches
- Choose punches that will give you enough variety for a dynamic bunch of flowers. Also make sure you choose a small flower punch that you will use for the center of your flowers.
- Beautiful Papers
- I found some beautiful papers from Paper Source but you can find papers at any craft store.
- Ranger Sue Weinberg Melting Pot & Tools
- I got my melting pot on Ebay for $25 with shipping. It also came with the tweezers and spatula.
- ¼ Yard Fabric
- Choose any color that matches your bouquet color to wrap around the bottom of your bouquet.
- Non Stick Craft Paper
- Utee Thick Enamel
- Gorilla Glue
- 12 Guage Floral Wire
- Small Block of Dense Foam
- Craft Tacky Glue
- Rubber Band
- Small Buttons or Pearls for the centers of the flowers
Things
you will need for the bouquet handle:
- 6” Wooden Dowels
- Lace or any fabric / ribbon you want to wrap your handle with.
- 3”-4” Diameter Foam Ball
- Small Buttons
Things
from around the house:
- Scissors
- Hot Glue Gun
- Needle Nose Pliers with Wire Cutter
- Small House Fan


Optional
Tools:
- Sizzix Die Cutter
- If you are a “hardcore” crafter like Mee! This is an amazing investment! I got my die cutter on sale at Joann’s for $70 and that doesn’t include the different dies you have to buy to use it. But once you know the ease of die cutting paper, felt, fabric, etc. you will never want to go back!
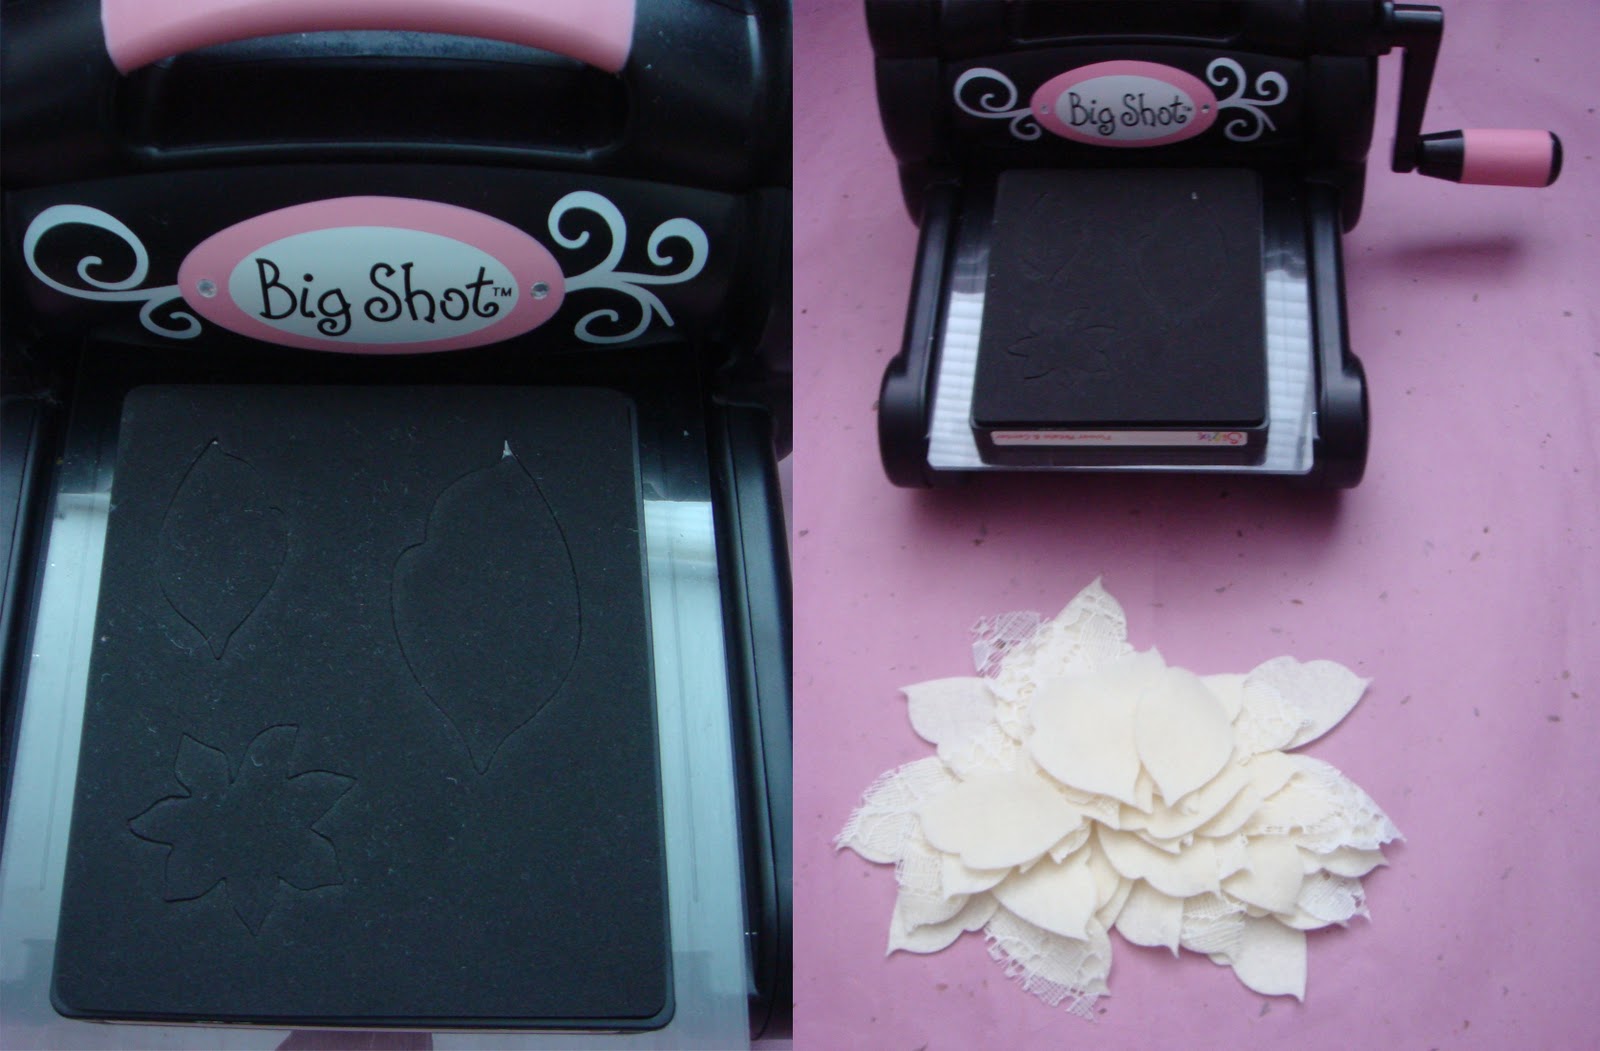
Step 1:
Either
punch or die cut your flowers. I suggest at least investing in the
paper punches otherwise you will be hand cutting flowers for a LONG
time. Once you have a substantial pile of different size flowers in
all the same colors or a variety of colors you are ready to glue.


Step 2:
Take
each flower cut out and cut from the edge of one of the petals to the
center of the flower. Take your Craft Tacky Glue and put a little on
one of the petals next to where you just cut and glue the adjacent
petal to it. Depending on what kind of paper you are using you might
have to clip you petals together and let them glue. In my case the
Tacky Glue was enough so I didn’t have to clip which was nice.
Repeat this step until all your flower cut-outs are 3D! Let
everything dry and by hand fold back your petals or curl them around
a finger.

Step 3:
Plug in
your Melting Pot and put it to the Utee setting. Make sure you have
your non-stick craft paper rolled out nearby otherwise you are going
to make a huge mess. Pour in a good amount of Utee Enamel into your
pot and let it melt without stirring it, which cause air bubbles. I
like to have a small fan next to me when I work because it helps dry
the enamel faster as well as clears the fumes from the melting
enamel.
I used
clear Utee Enamel which turns an amber color very fast but is still
pretty. You can purchase many different colors and test out how it
looks with different papers. After the enamel is melted take your
per-made 3D flower cut-outs and dip them one at a time into the
enamel. Using your tweezers and coat both sides of the flower and
then place it onto your non-stick craft sheet. This sheet is amazing!
You can drag your flower along it to get the excess enamel off and
after a few seconds the enamel will be dry enough to peel off the
craft sheet and throw back into the melting pot! Repeat this process
until you have dipped all of your flowers cut-outs. Tip: If you
excess enamel on your petals you can simply use a pair of small
scissors and it will snip right off. It is always easier to do this
process when your enamel is not fully dry but can be done after. It
takes less than 60 seconds for the enamel to fully dry so working
quickly is key.


Step 4:
After
you have dipped all your cut-outs it is easier to see how many layers
you want your flowers to be. Stack your dipped cut-outs and make your
desired flowers. After you have your stacked piles take out your
floral wire and cut it to approximately 4” lengths. Bend the end of
each wire with your finger or with your pliers. Put a good amount of
hot glue on the inside of your bottom layer of one stacked flower and
glue down the wire. My die cut pattern had a hole in each flower but
if yours don’t you can simply cut one in your bottom flower layer
so you can thread your wire through. Once the wire is glued continue
gluing your layers as you had already stacked them.


If your
flowers don’t have enough surface area to glue into the next layer
cut a small piece of dense foam and glue in-between the layers to act
as a spacer.
Once
your flower has all its layers glued including its small center piece
take a rhinestone, pearl, button, or anything else you can think of
and glue it in the very center of your flower.


Now you
can place the wire steam of your completed flower into your block of
dense foam block and continue on to the next flower. Depending on how
big your foam ball is (which will be attached to your handle) and how
big your flowers are will tell you how many flowers you will need to
make. In my case I used the Sizzix Flower Layers # 3 with a 3” foam
ball and used 19 flowers to complete my bouquet.

Step 5:
Making
the handle!
I am
sure there are hundreds of ways to make a bouquet handle but this is
what I made up and it works well. You can also buy plastic bouquet
handles with dense foam tops from Michaels Craft Stores for about $5.
For my handle you need to either find (6) 6”wooden dowels or cut
dowels down to 6” lengths. I found 12” long dowels at Michaels
and used a small hack saw to cut them in half. After you have your
dowels at the length you want them take your hot glue gun and run a
line of glue down one of the dowels and then glue two together.
Continue gluing in a circle until you have your handle. If you have
cut your dowels yourself make sure the rough cut edges are all in the
same direction and the smooth factory edges are all level and on one
side.

Once the
dowels are glued cut a piece of the same paper you used for your
flowers and cut it to size. Cut out a piece of lace or matching
fabric that is larger than the diameter of the bottom of your handle
and glue the piece to the factory edges of the dowels. Cut the excess
fabric edges and wrap it around the side of the dowels and glue them
down. I wrapped the same paper as I used for the white part of my
flowers around the dowels and glue the edge with your craft tacky
glue. I used a piece of lace and covered the edge of the paper and
also wrapped a 4” piece of lace around the paper so the user can
hold the lace and not the paper. You can use any type of fabric,
lace, and paper combination for the handle. I also glued on a few
small buttons along the length of the handle for decoration.


Now take
your foam ball and push your finished handle (the cut rough end) into
the top of it. Push it down about 1” in depth. Pull the handle out
and I put some Gorilla Glue into the hole and replace the handle back
in. Let that dry and now you have a handle or a pretty foam
microphone which is key for singing alone at home!


Step 6:
Take
your handle and wrap your ¼ yard of fabric or lace around the top
and wrap an elastic band around the bottom of your foam ball.


Now that
you have your dry handle and your dry flowers with wire stems……it’s
time to assemble! I like to arrange my flowers by pushing the stems
into the foam ball until I like the way it looks. Once I have
arranged the flowers the way I want them to look I take my Gorilla
Glue and cover the bottom of the stem. Be careful with the Gorilla
Glue it expands when it dries and can be hard to work with but it is
the best glue for foam because it expands inside the foam and really
becomes secure. Repeat this process and you have done it!


You just
made a unique handmade bouquet that will last forever! As long as you
don’t get to drunk at your wedding and smash it (not saying I would
ever do that)….hehe….you will have a beautiful bouquet for years
to come. The hard work you put into it will pay off for your big day!